Installing Modpack on the Server
Once you have selected and tried out the modpack, it is time we install it on the server and play with friends  !
!
Downloading Server Pack
Curseforge
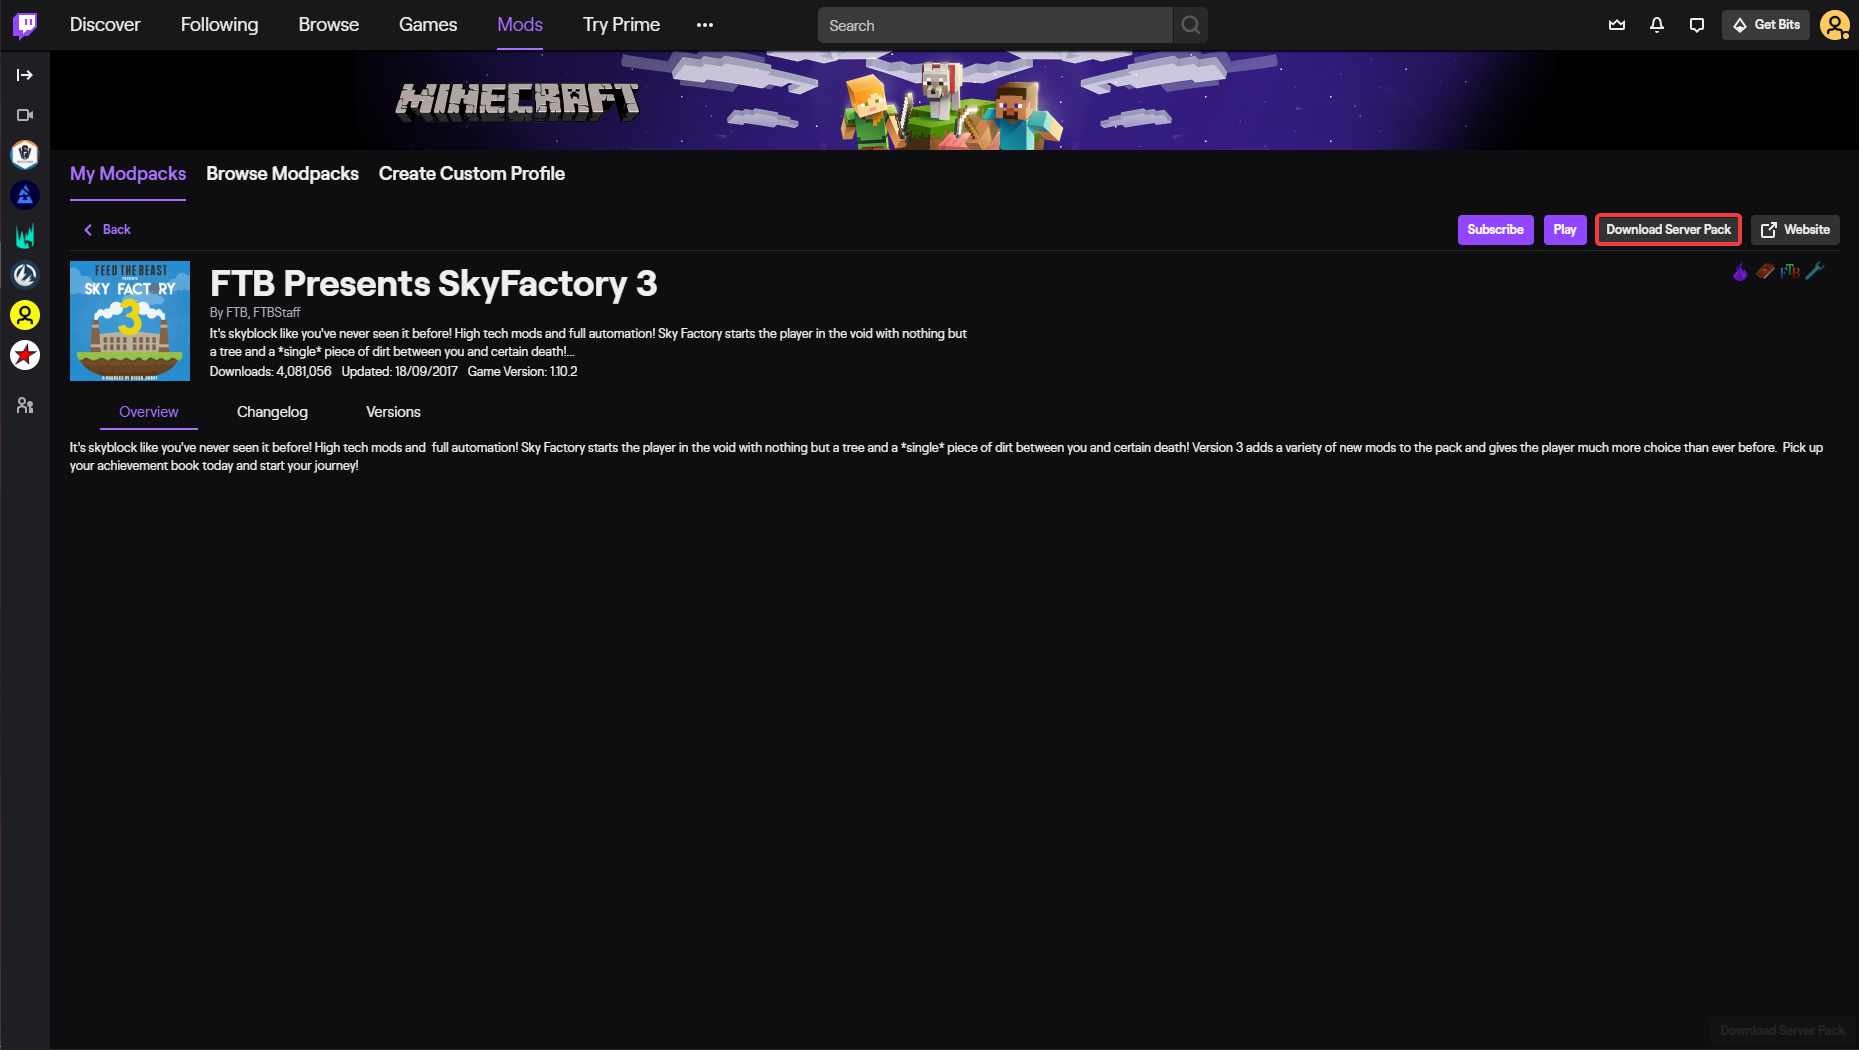
Go back to the Twitch App, into the Modpacks > Minecraft > Browse Modpacks > Select/Search your Modpack > Click Download Server Pack. This will open an empty page in your browser and start downloading Server pack.
Info
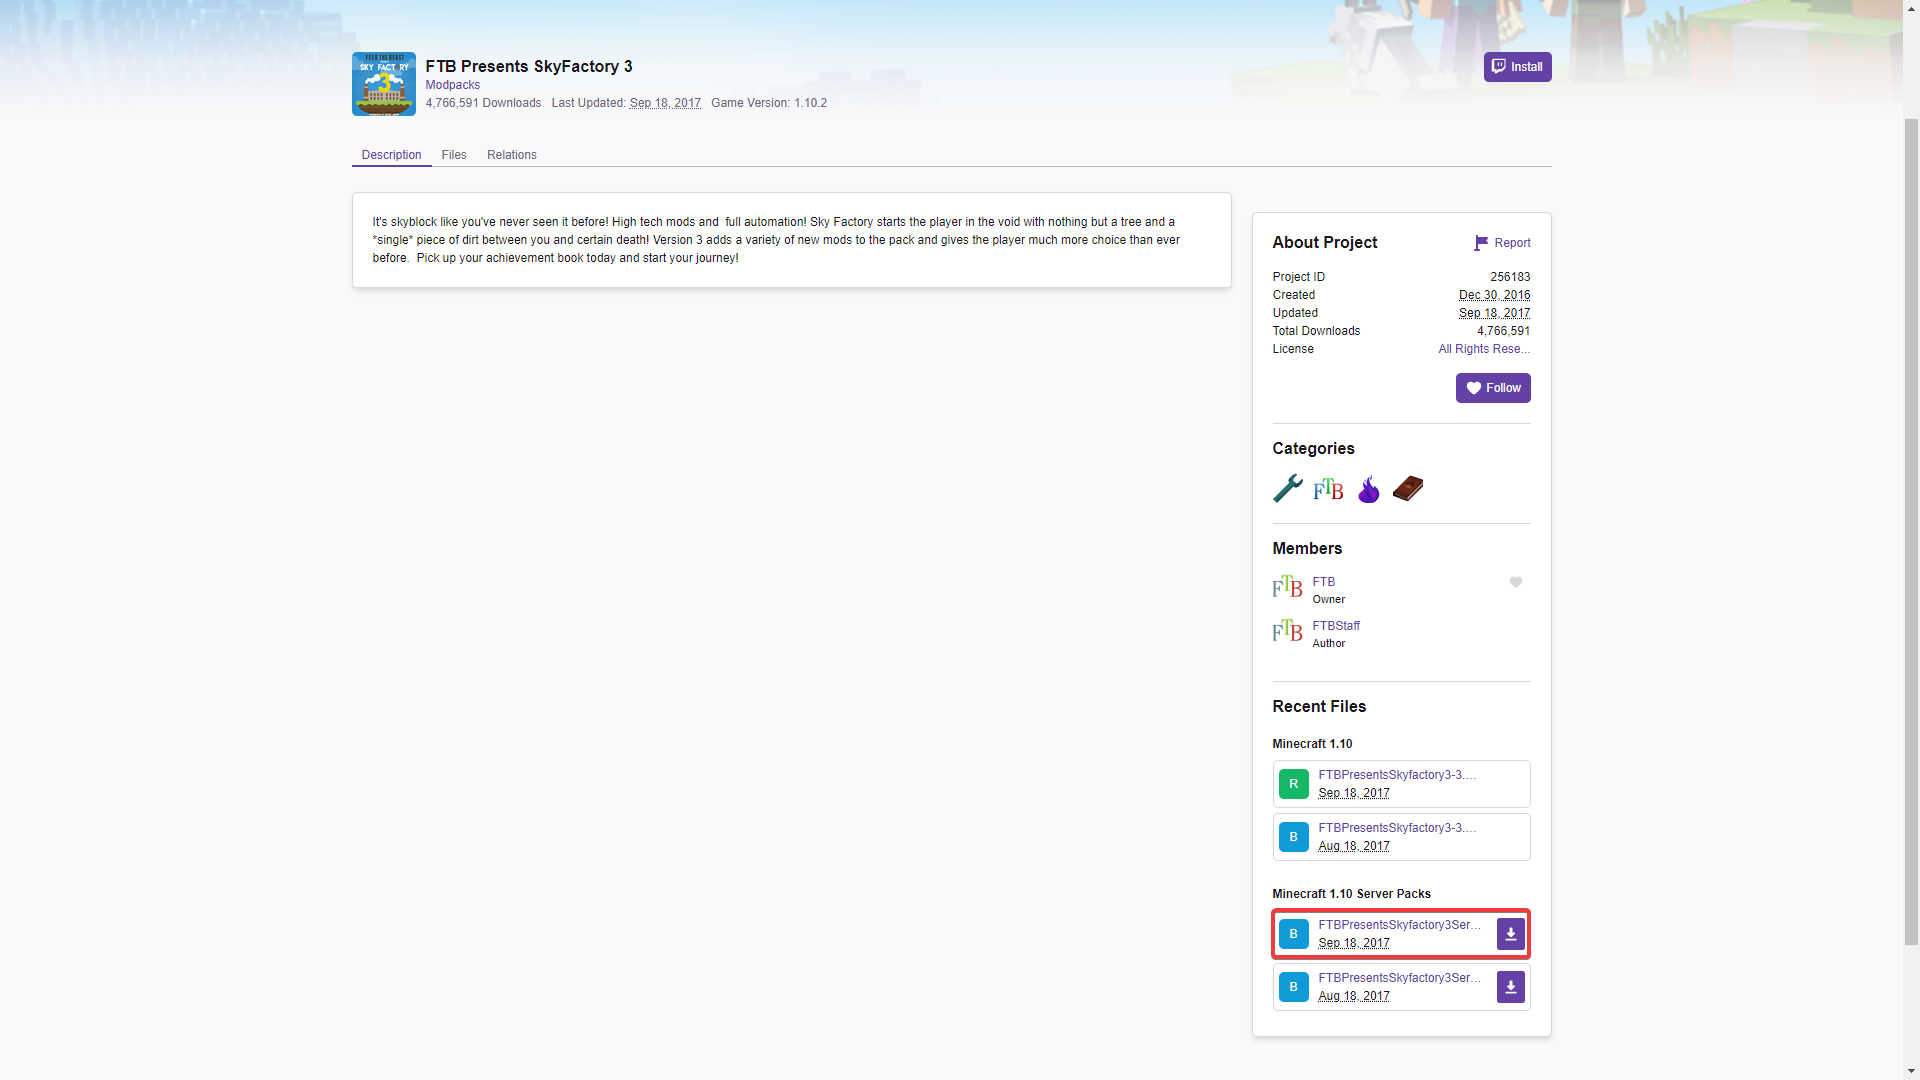
If you don't see this button, Make sure you are opening this page from "Browse Modpacks" and not "My Modpacks". At the time of writing, when opening Modpack from "My Modpacks" I was not not getting the Download Server Pack button. You can also alternatively click " Website" button. Modpack's webpage will open in your browser. Scroll down a bit and on the right sidebar you will see download links for "Server packs".
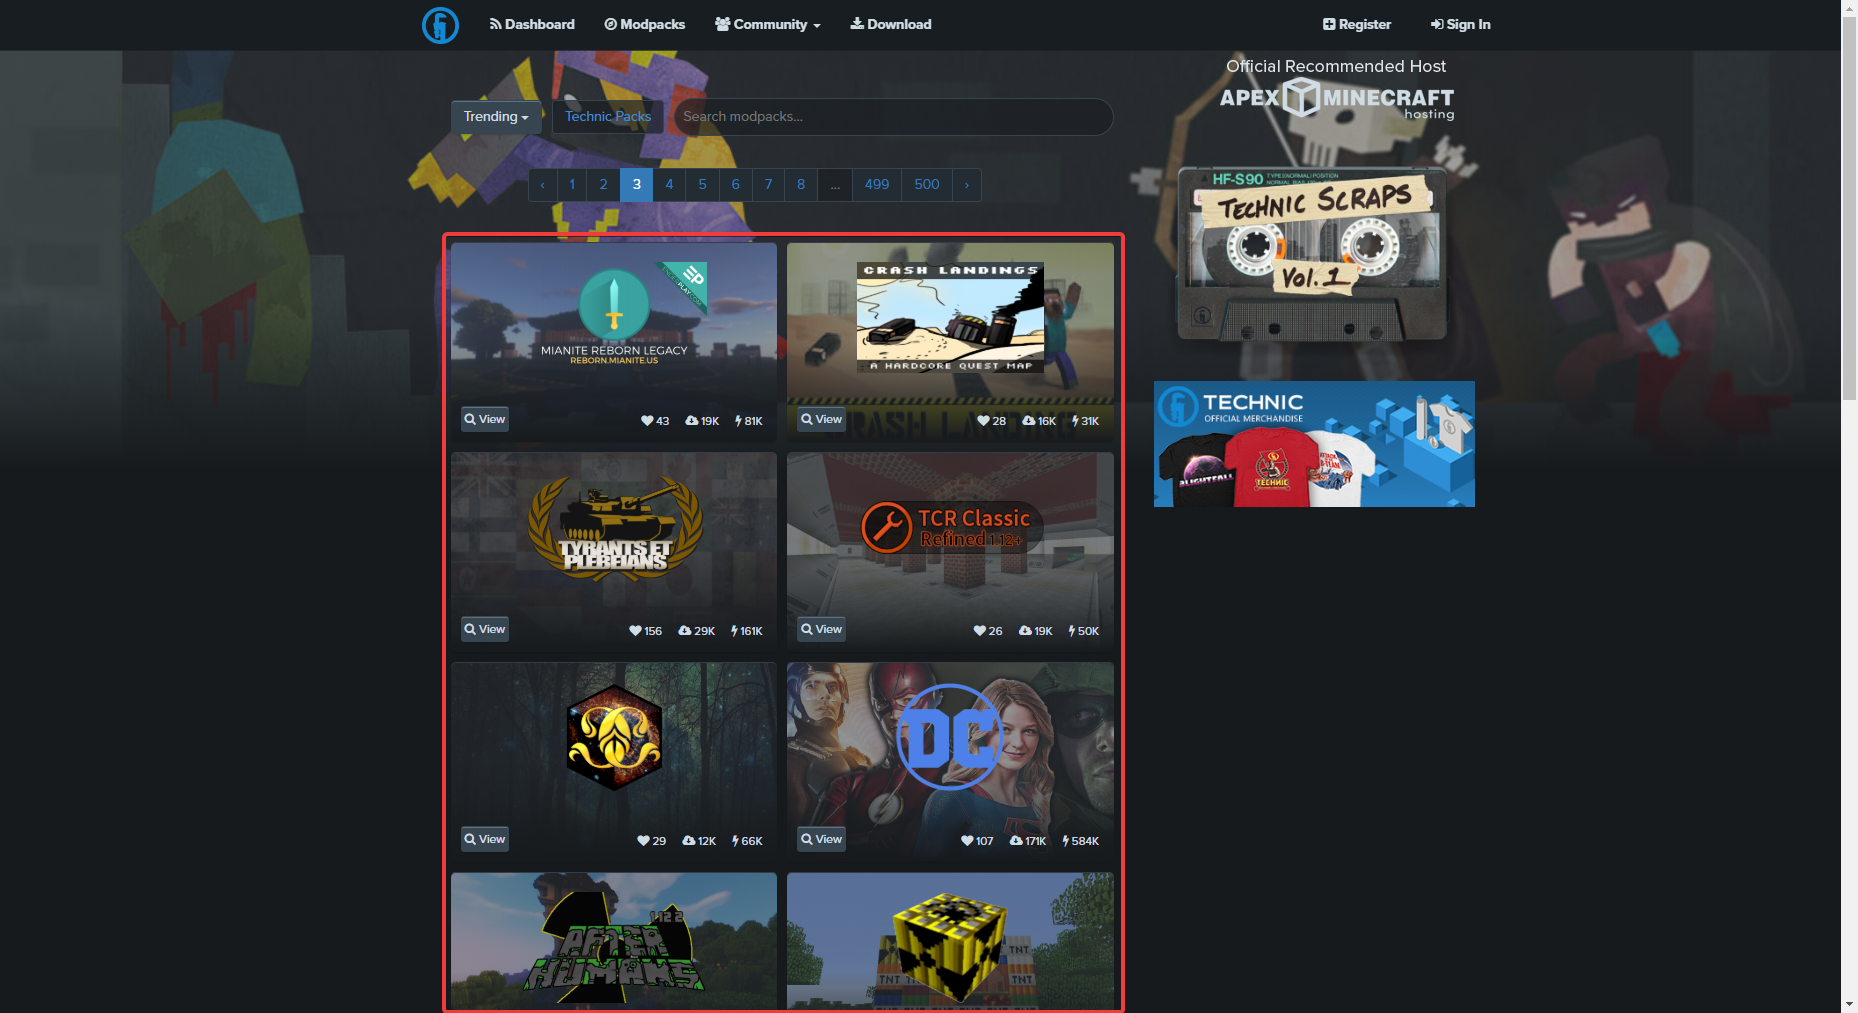
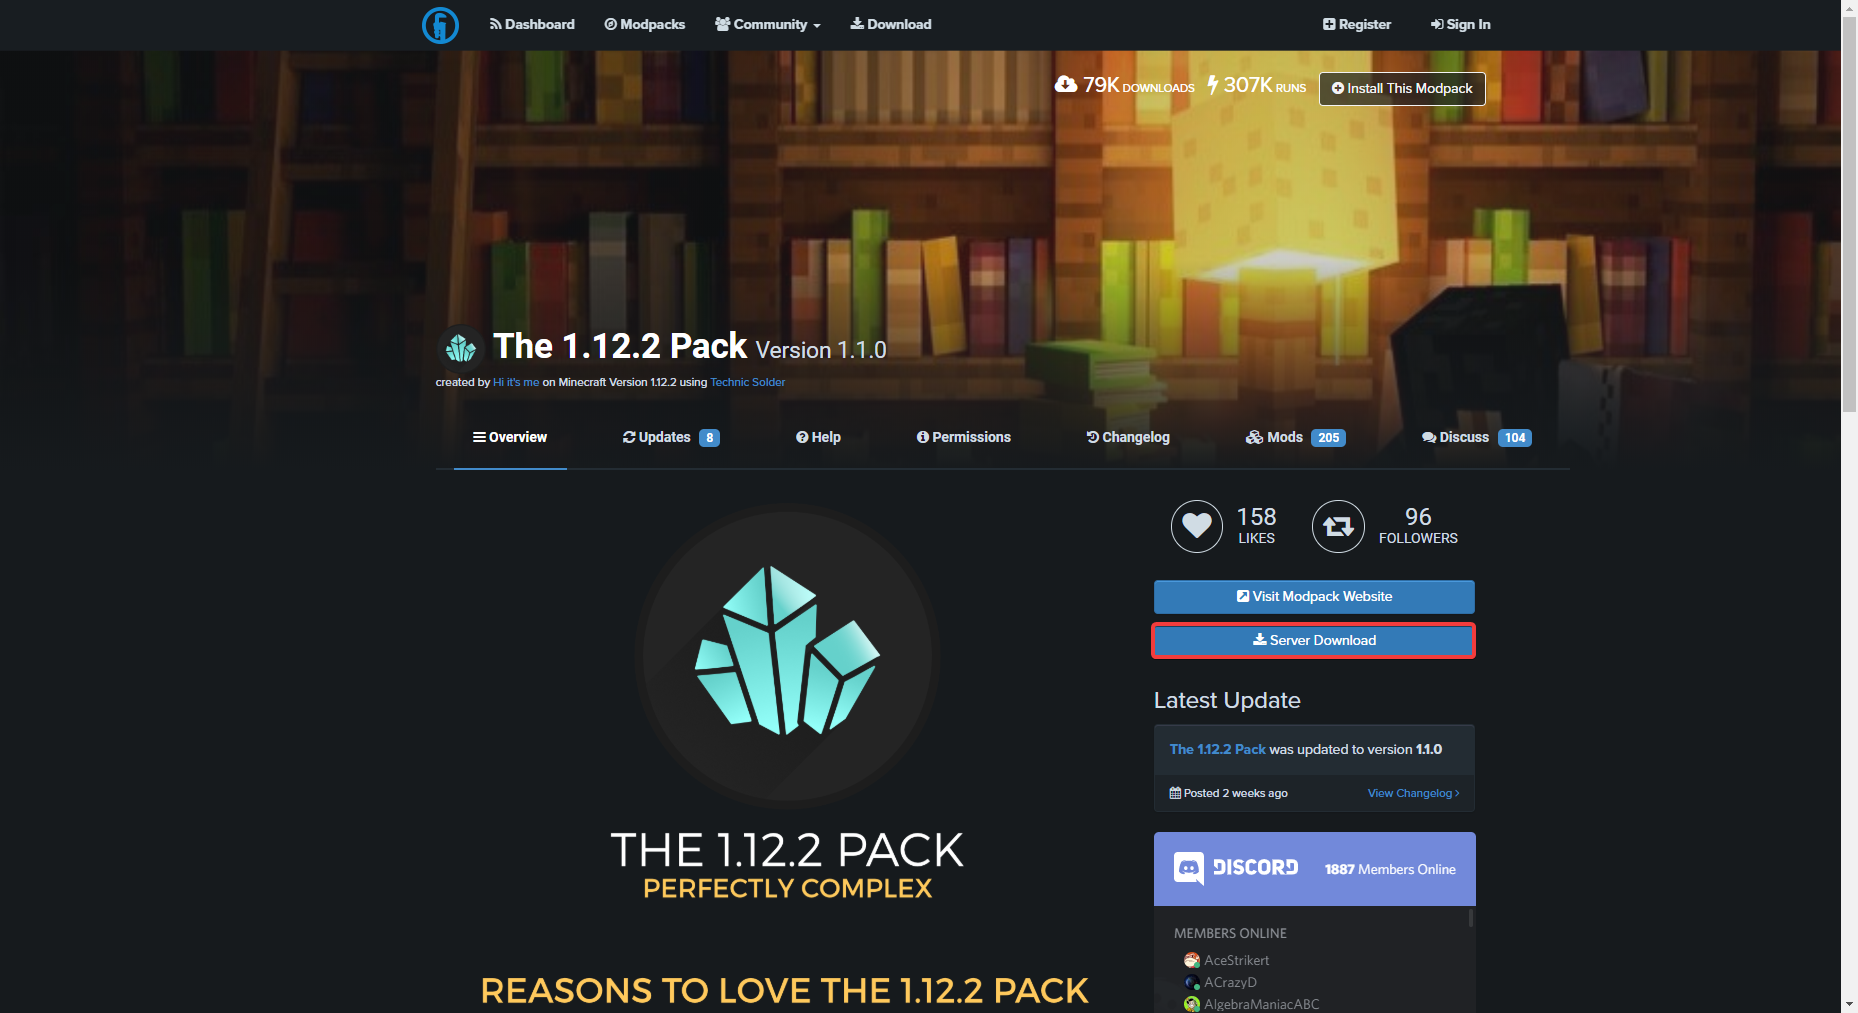
TechnicPack
Go to the https://www.technicpack.net/modpacks and Select/Search Modpack of your choice.
If you already have Installed Modpack in Technic Launcher, from Launcher you can open it in the browser by clicking on its picture.
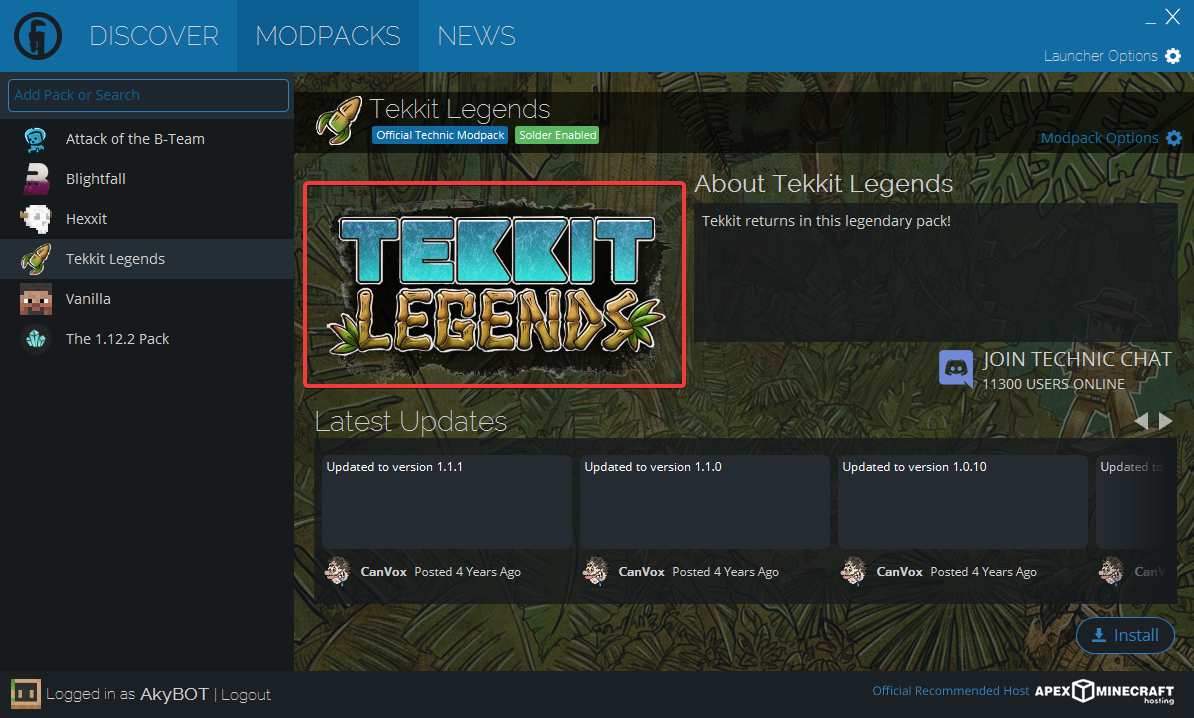
Click the Server Download button.
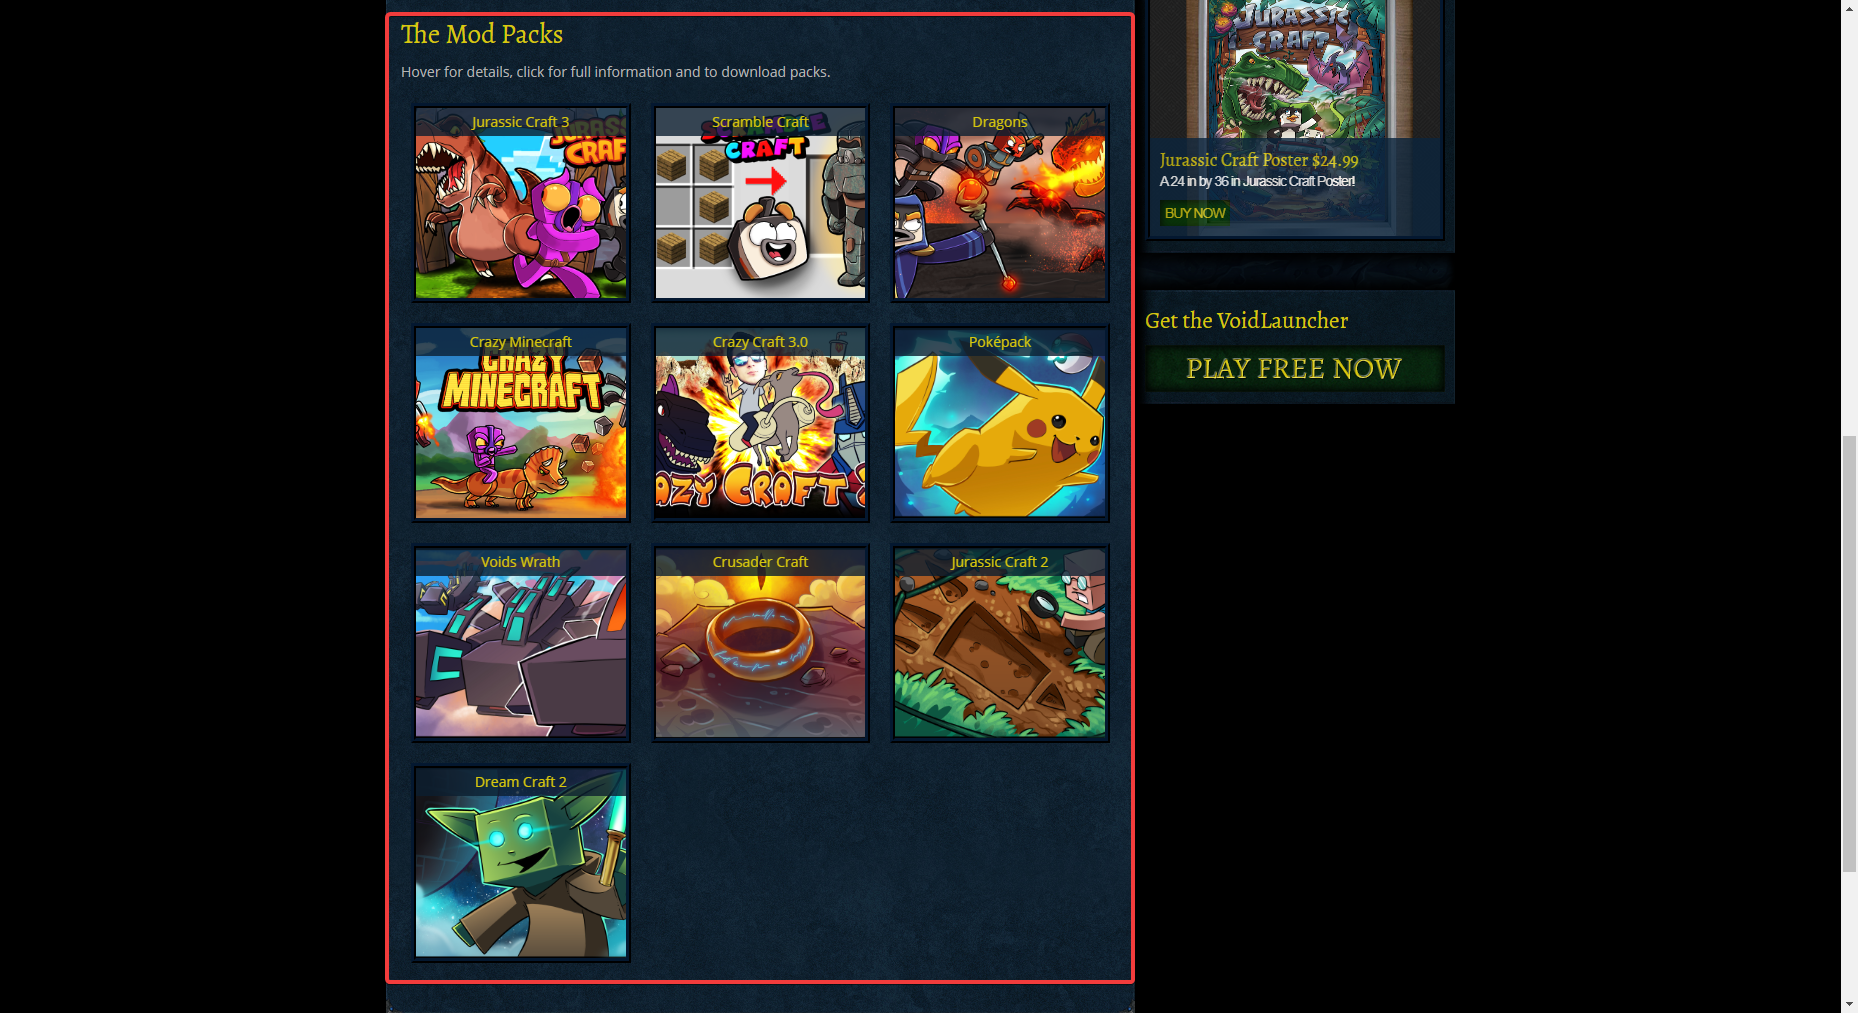
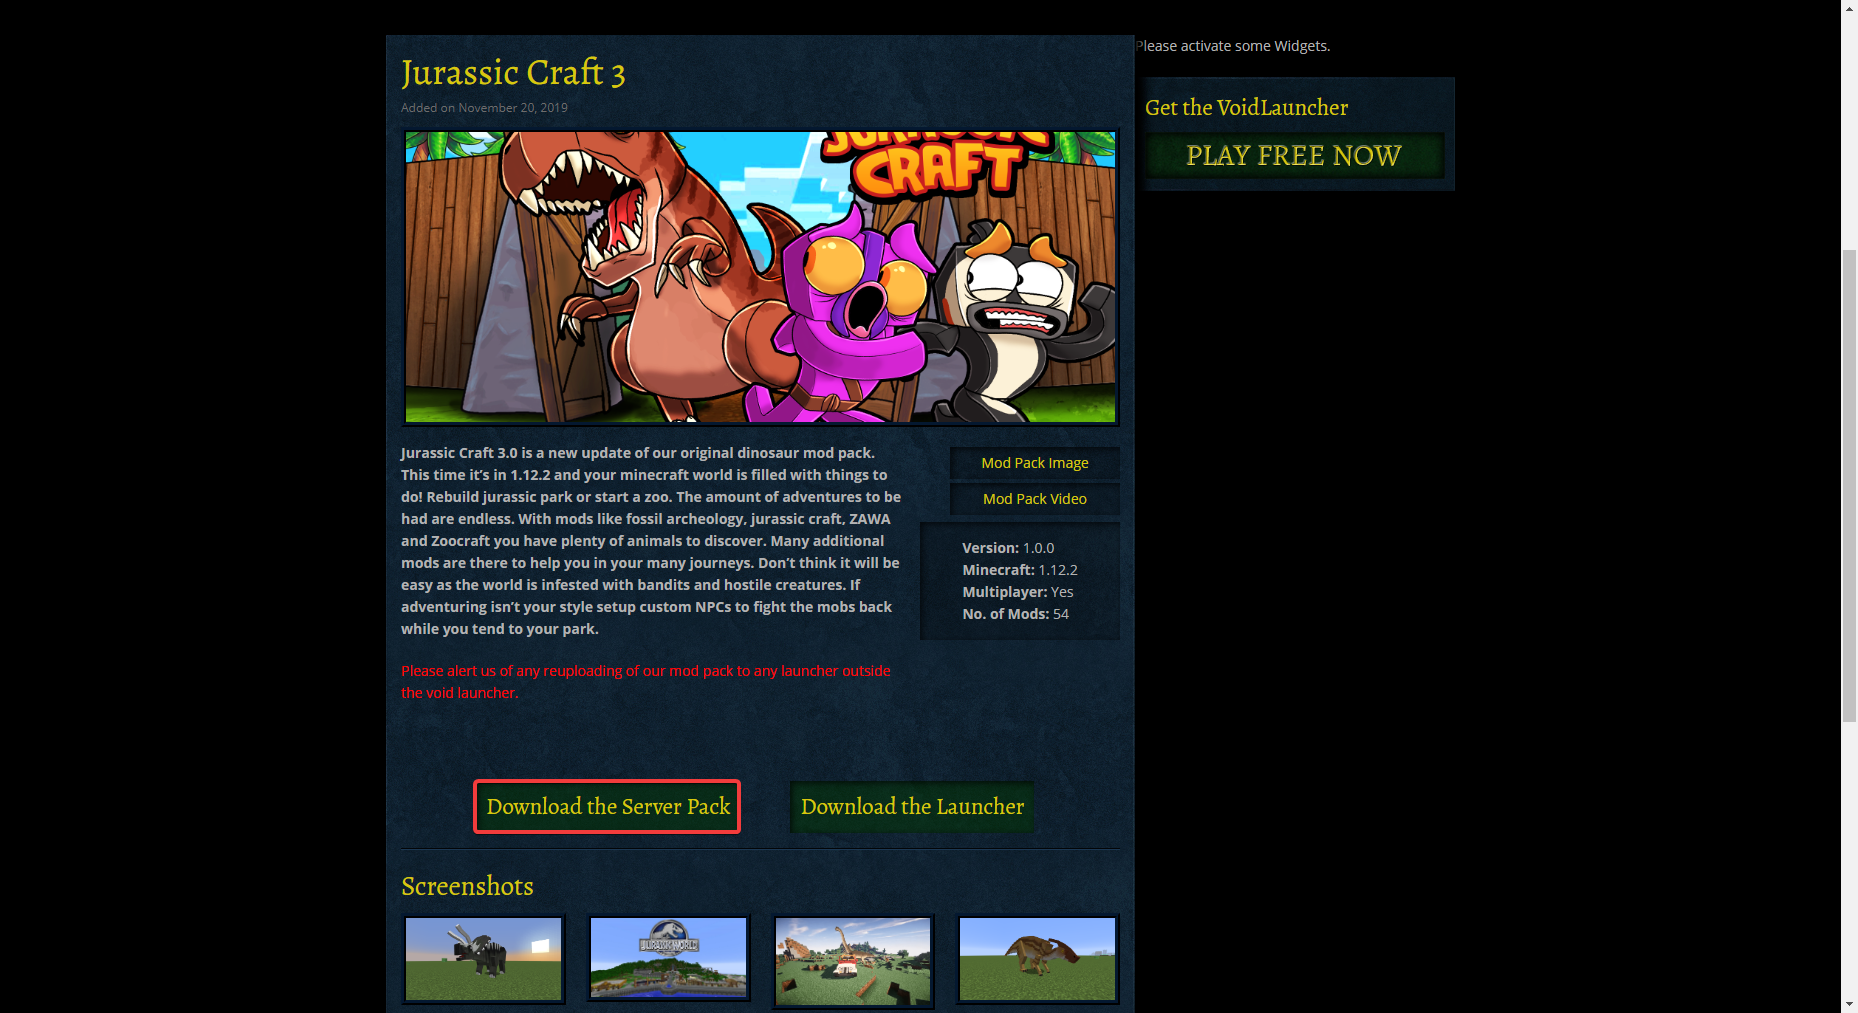
VoidsWrath
Open http://test.voidswrath.com/mod-packs/, scroll down and select Mod pack.
Click Download the Server Pack.
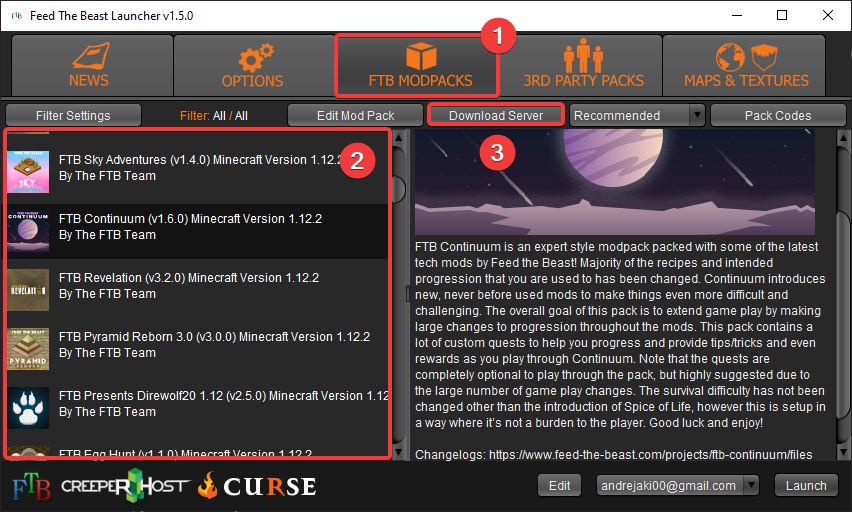
Feed the Beast
Open Feed the Beast Launcher. Go to FTB Modpacks for Official Feed the Beast modpacks or 3rd Party Modpacks for Community modpacks. Select modpack.
Click Download Server!
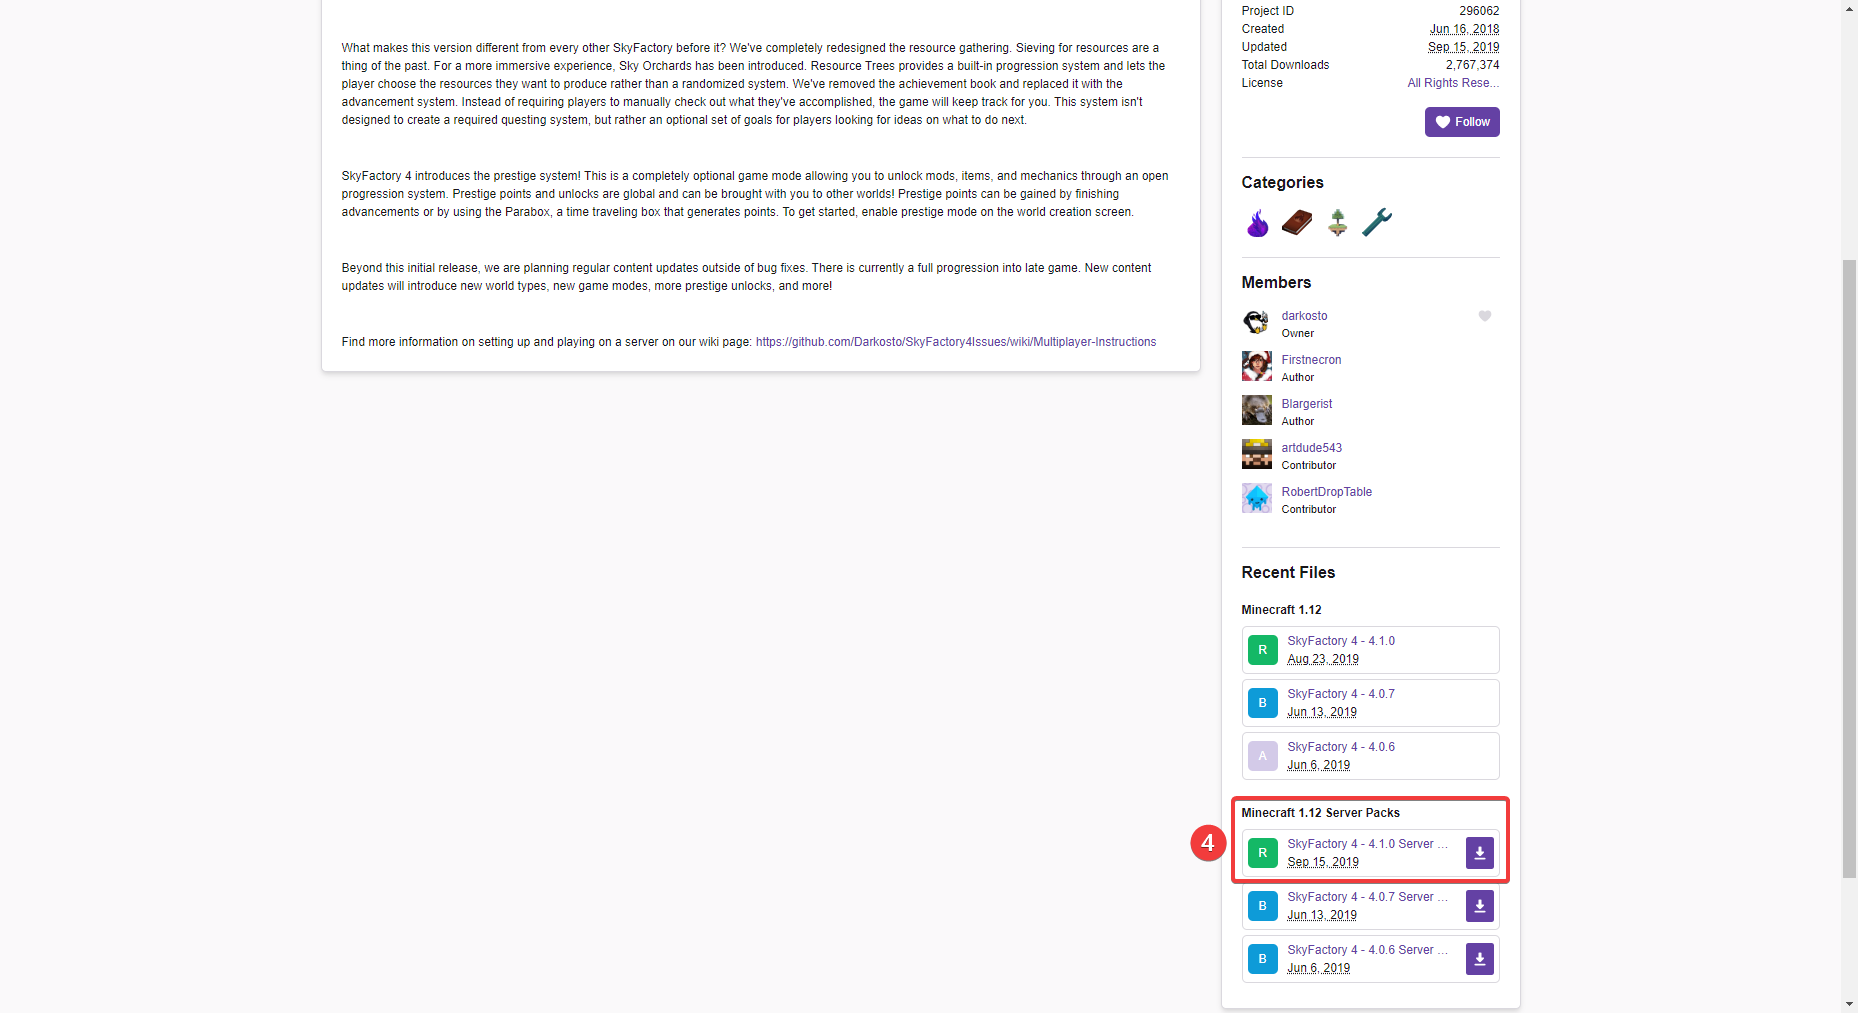
TLauncher
Head back to the TLauncher, open TL Mods and select/search modpack.
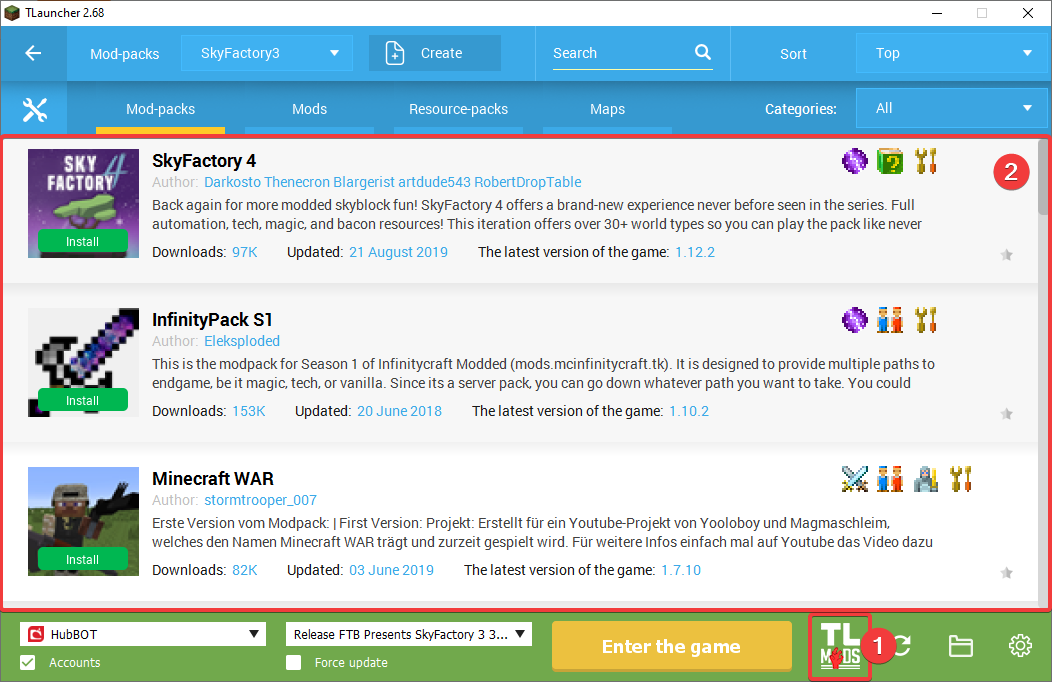
Click the Official site button. This will open the Modpacks Curseforge page.

Scroll down and download Server pack.
Installing Server pack
Once downloaded let's open up and extract the archive into an empty folder!

Open the folder in File Explorer/Finder. From here, run Install.bat if you are on Windows or Install.sh if you are on macOS. If such or similar file doesn't exist run StartServer, ServerStart or Start .(bat|sh) file.
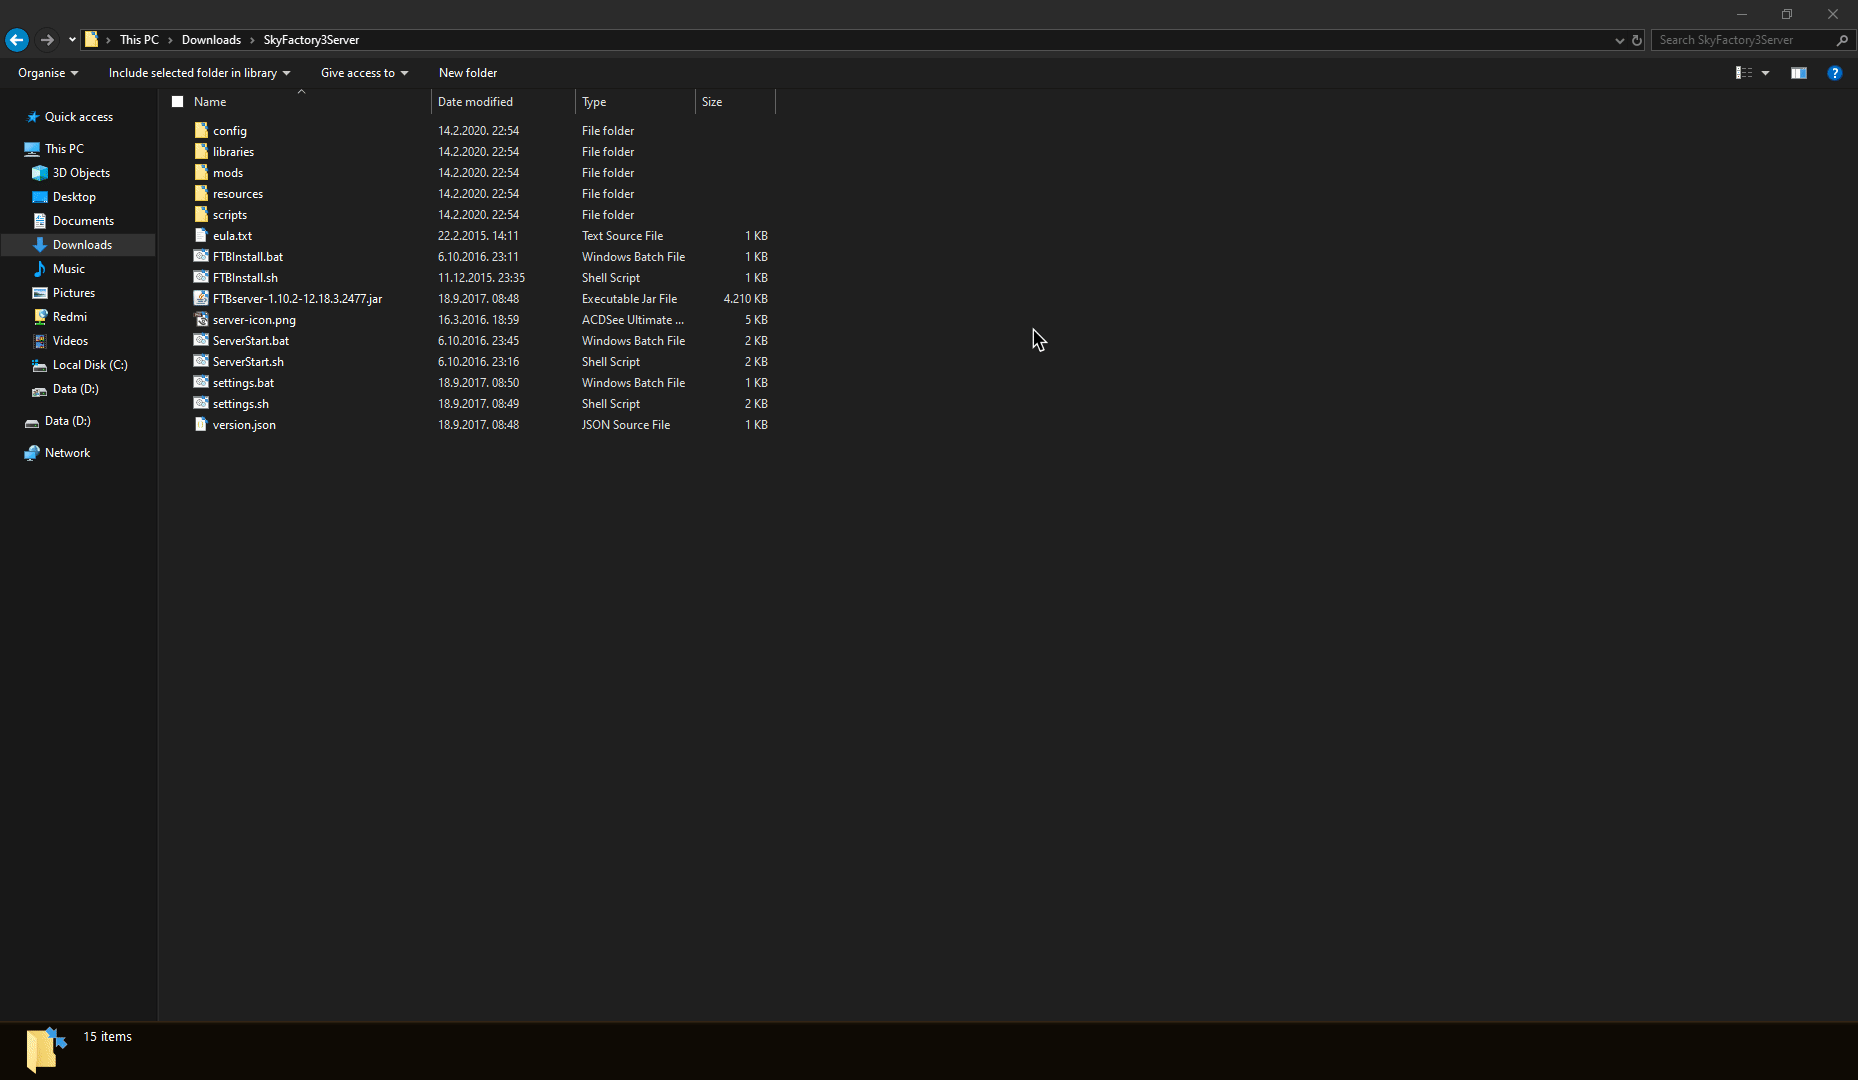
After it's finished, Command Prompt or Terminal window will close or you will get Success Message. In case of Start file, once Minecraft server starts up you can stop it.
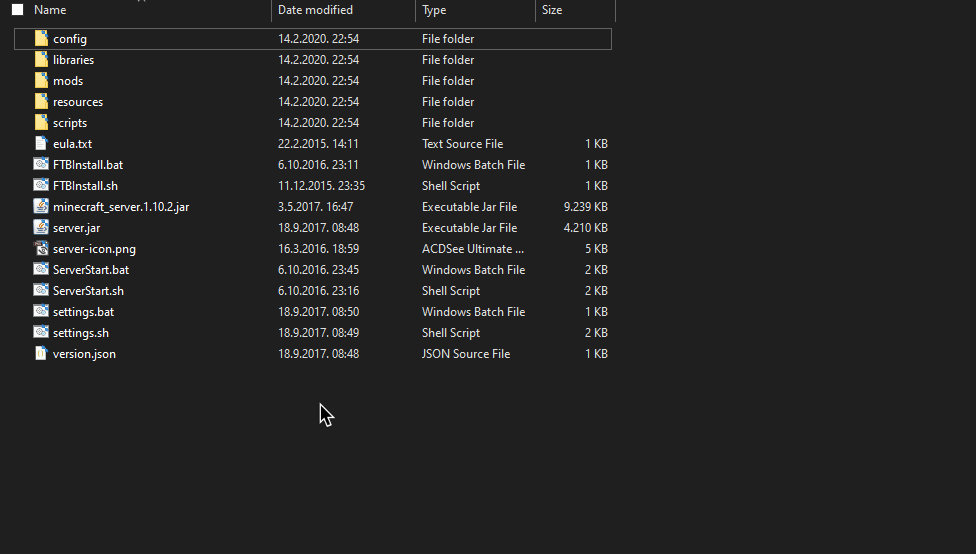
Rename forge-1.xxxxx, FTBServer-1.xxxxx, Modpack_name, ... .jar to server.jar.

Select all files inside folder except world, world_nether and world_the_end (if you started server). Right-click or control-click. If on Windows select Send to > Compressed (zipped) folder. If on macOS select Compress option.
Archive must be the type of ZIP!
If your server has any files, make sure to back them up and delete them to install modpack!
Now it's time to upload created ZIP Archive to our server. As this file is usually bigger than file upload limit on File Management of 100 MB, I will be using SFTP Client. To learn what is SFTP Client and how to use it click here.
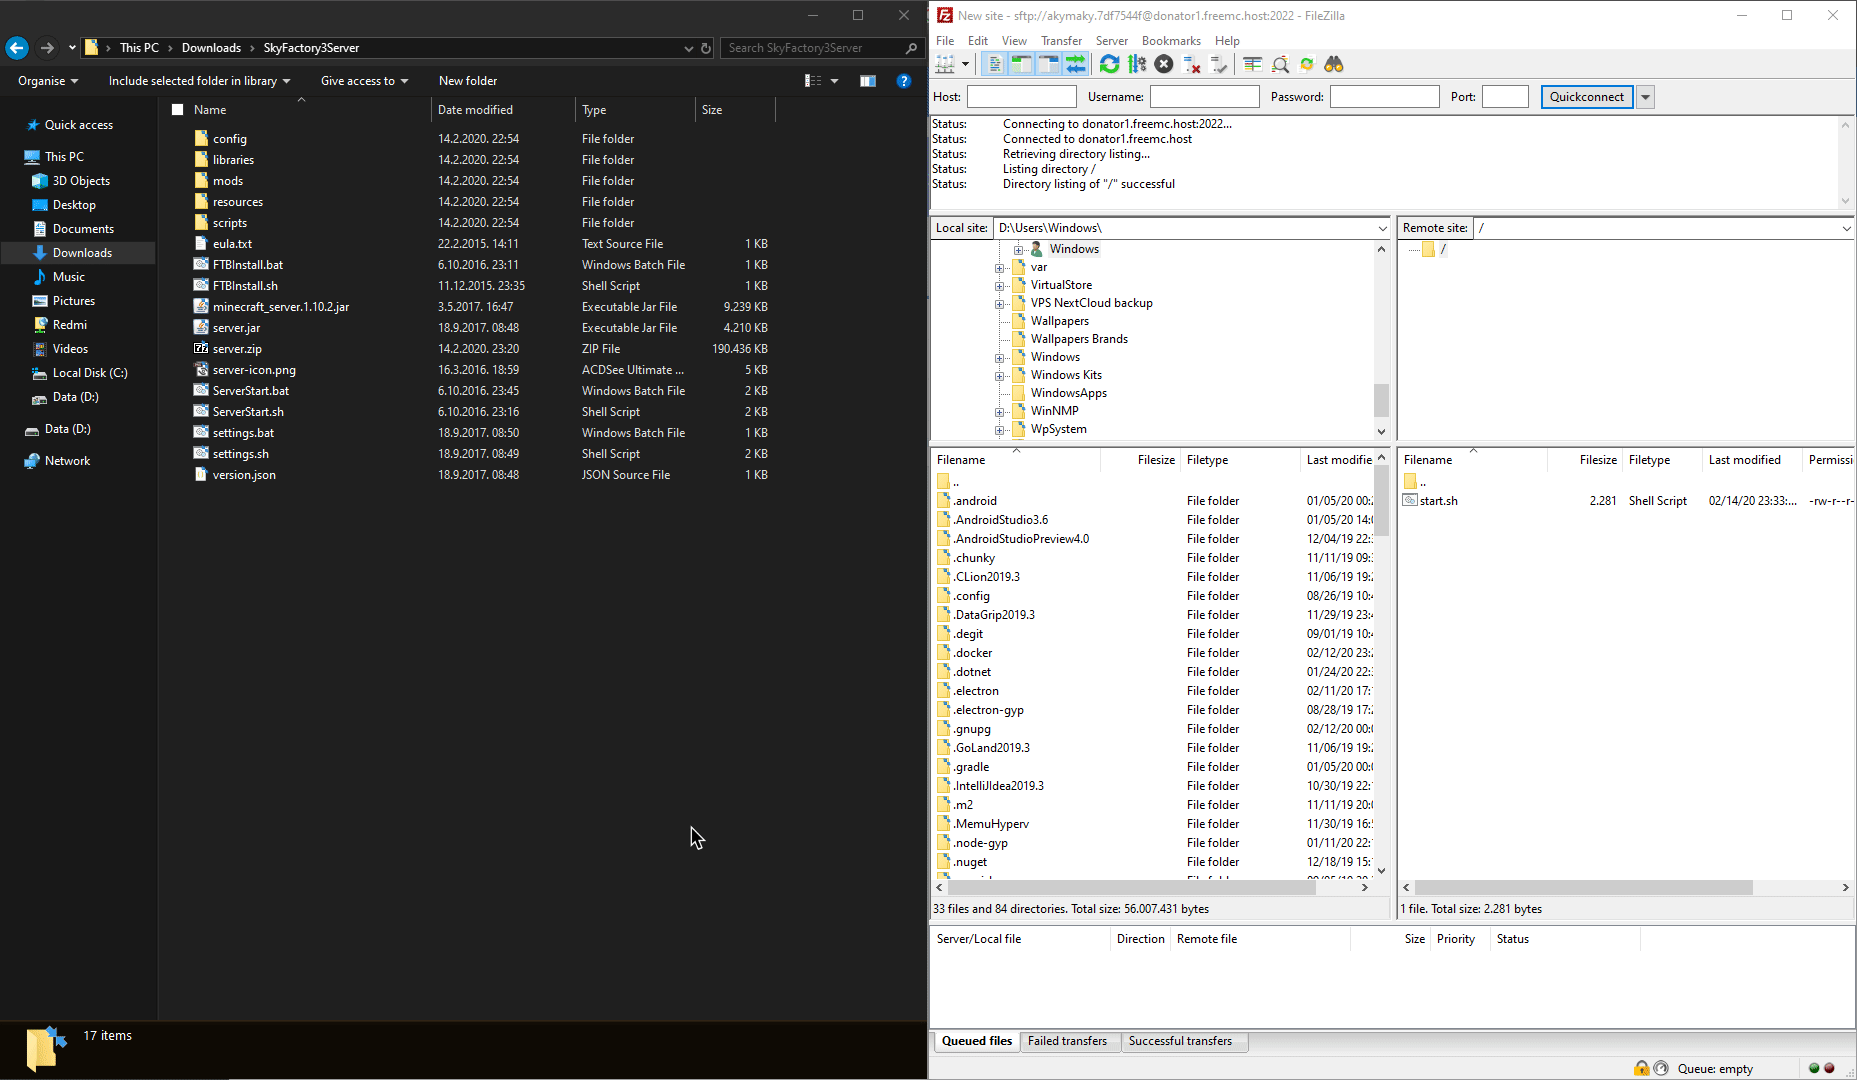
Uploading might take a while depending on the speed of your Internet connection.
If you get a red error popup saying "File is too big", use SFTP Client to upload it instead.
Once finished, open up File Management and Decompress uploaded archive.
If you get an error, don't panic!! Wait a few seconds for decompressing to finish, close the error and Refresh the page!
In most cases decompressing was successful! It's a known bug due to decompressing large archives. However, if there are no files after the refresh, decompress archive in an empty folder on your computer then use SFTP Client to upload files and folders to your server.

You can delete uploaded Archive, you won't need it (unless you break some mods  ), to save some disk space!
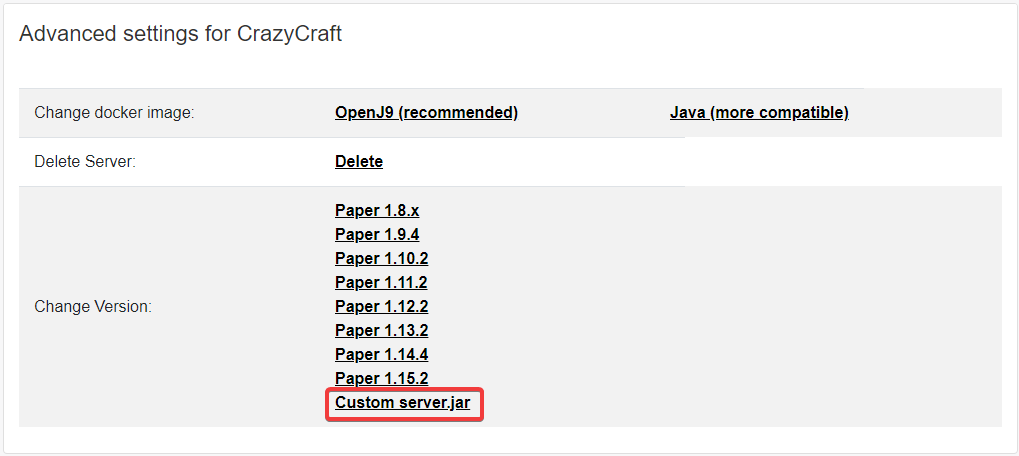
Before starting the server, we want to go to the FreeMC.Host Website and open Advanced Settings of our server. In here, we want to select "Custom server.jar" from Changing version section.
And finally, the moment we have all been waiting for! Starting our modpack server!!!
If your server fails to start, go into the server's Advanced Settings on FreeMC.Host Dashboard and under "Change Docker image" section select "Java (more compatible)".